Application Setup
There are many settings that the administrator needs to manage. These settings are applied globally, so it is important to understand the meaning of each item and their impact on the application.
Please notify the users to hit CTRL + F5 in their browser in order to apply (most of) the new application settings.
Five categories can be identified which coincidentally are displayed as tabs:
- General
- Planning
- Map
- Advanced
- Security
Detailed information about these tabs will be elaborated in the subsequent sections.
General
| Field | Description |
|---|---|
| Company name | The company name |
| Company address | The primary address. This address will be used as the default location on the map. |
| Company address country | The primary address' country. |
| Duration format | How the planning totals on a task (required, planned, remaining) should be displayed |
| Enable Exchange | When activated, appointments are synchronized with Exchange mailboxes. Read more about this here. |
| Enable error logging | Select yes to show client side error messages and propose to report them to Dime Software for further investigation. |
Exchange synchronization
When activated, synchronization of the planning board(s) with the Exchange calendars of the resources is enabled. Administrator can choose which resources to connect by flagging the Exchange Integration Enabled field in the resources setup view.
Note that this option needs to be included in the license and the Exchange connector requires extra setup.
Planning
| Field | Description |
|---|---|
| Export server URI | This is the URI of the export server. The default value is https://pdf.dimescheduler.com but if needed, the export server can be hosted on-premise. |
| Enable appointment containers | Feature flag to toggle appointment containers. |
| Enable planning board toolip | When activated, the tooltip will be enabled. |
| Apply requested dates | When activated, appointments will be created from the task's Requested start date and Requested End Date fields. Read more about this here. |
| Apply requested times | When activated, appointments will be created from the task's Requested start time and Requested End time fields. Read more about this here. |
| Respect allowed date constraints | When activated, extra data validation will be executed on tasks. Read more about this here. |
| Visualize resource calendars | When enabled, your time will be visualized in the planning board. Read more about it here. |
| Resource zones color | Date picker to choose the background color of non-working times in the planning board. Read more about it here. |
| Switch on calendar mode | When switched on, appointment's duration will be automatically recalculated to take non-working time into account. Read more about it here. |
| Multi-day capacity distribution mode | This field controls the way how the capacity is calculated for multi-day appointments. To learn about what they are and what they do, continue here. |
Applying requested dates
When you drag and drop a task from the open task list onto the planning board, this setting will force an appointment to be created using the Requested start date and Requested End Date parameters of the task:
- When only the
Requested start dateis populated, the appointment is created on theRequested start datewith the duration as specified on the task'sDurationvalue. - If both
Requested start dateandRequested end dateare filled out, an appointment is created with start and dates equal to the requested start and end dates.
Applying requested times
The scope to this setting is nearly identical to the requested dates feature but with one different detail: instead of applying dates, this feature applies only hours and minutes; thus it does not affect the date.
Respect allowed date constraints
When you drag and drop an appointment, this setting disallows the user to place an appointment outside the Earliest Allowed Date or Latest Allowed Date, which is data that can be found on the task.
Appointments that created manually or backed by tasks which have no requirements set on these fields will not be impacted by this restricted planning mode.
Calendars
Calendars are used to define common work patterns. They are used in the Gantt chart and the planning board.
Calendars fulfill two functions in the planning board:
- Showing unavailable working times for each resource
- Recalculating the duration of an appointment to take non-working time into account
These are reflected in the following three configuration items:
- Visualize resource calendars
- Resource zones color
- Switch on calendar mode
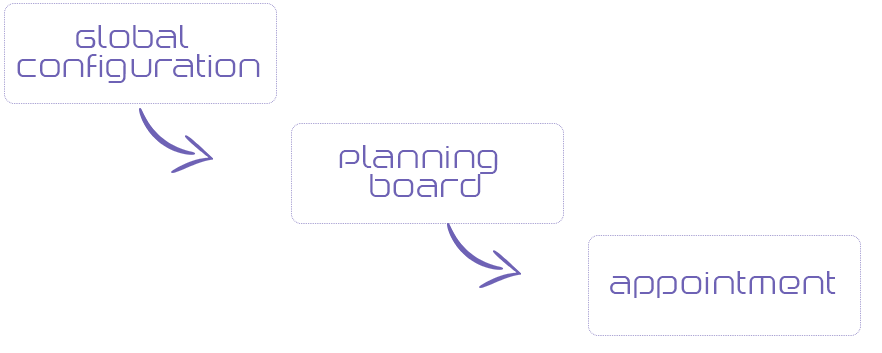
The first two are particularly useful for the planner because the user will actually see when resources are available. The last one is part of the optimization suite and is quite powerful: When an appointment is created or updated, the application will automatically extend the duration to make sure the resource can finish the task according to his calendar. For example, if a resource has a normal nine to five job and is scheduled to perform a task (which takes two hours) at four o'clock, then the application will be smart enough to set the end date to the following day at ten o'clock. The planner can always override this behavior in the planning board or the appointment, which is a good example of the multi-layered configuration mechanism Dime.Scheduler applies:

Map
| Field | Description |
|---|---|
| Url | The URI to the map service. This is entered by default and should not be changed unless specified by Dime Software's support team. |
| Token | To get access to the map service you will receive an identification code or token which you need to fill out here. |
| Show route, distance and travel time | Activate automatic route calculation on the map. A route will be calculated between all selected Tasks and Appointments. |
| Unit of distance | Select the unit in which you want to display the calculated distance on the map (see above). |
| Route profile | The profile (vehicle type) to be used for route, distance and travel time calculation (e.g. fast car, slow truck, etc.). |
| Show waypoint sequence | Show the route selection sequence by displaying a number in the pins on the map. |
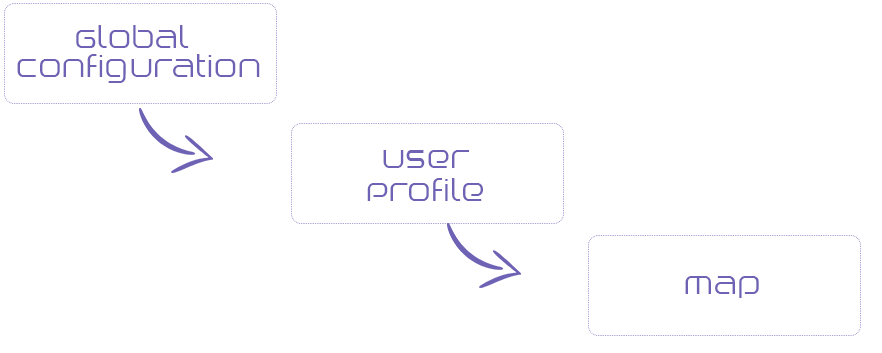
There are heaps of features on the map, just as there are many configurable items on multiple levels. The highest configuration level is, of course, the application setup. However, users are free to override the following elements on the user profile level:
- Show route, distance and travel time
- Unit of distance
- Route profile
- Show waypoint sequence
The best way to understand this multi-layered configuration mechanism is via the following graph:

Like the above image suggests, the different levels are cascading. The application setup provides the default configuration but can be overridden by users on the user profile level and ultimately, on the map itself. This mechanism complies with Dime.Scheduler's philosophy of maximum flexibility and leaving it up to the users to decide what works best for them, without compromising on usability.
Advanced
| Field | Description |
|---|---|
| Do not count appointment resource | Do not take the number of appointment resources into account when calculating the Task planning totals. E.g. an appointment with two or more resources will be counted as one. |
| Disable recalculate planning quantity | Don't calculate planning totals on the Ttsk. This can be useful for performance reasons in some specific cases. |
| Reload tasks on date change | N/A |
Security
This section is concerned with the connection to Azure and Windows Active Directory. Active Directory is Microsoft's attempt to allow network administrators to manage users (among other objects) in the organization, and gives them a way to authenticate and authorize users.
Instead of using different credentials for every application (therefore storing sensitive information in separate databases), Active Directory can be used as an identity service. This is generally safer and easier for the users as well, because the need to enter credentials is strongly reduced.
To activate this authentication type in Dime.Scheduler, the following information is required:
| Field | Description |
|---|---|
| Azure AD Client Id | To use Azure AD accounts, you need to specify the Azure AD Client credentials |
| Azure AD Client Secret | See above |
| Active Directory Domain | To use Windows accounts, you need to specify the domain name in order for Dime.Scheduler to contact the Domain Controller to validate credentials. |
| Active Directory User | Provide a user with the appropriate permissions to contact the domain controller. |
| Active Directory Password | Provide the password for the user above. |
Note that Windows AD and Azure AD are two different systems, although they can be connected. To learn more about setting up Azure, consult this guide.
Change logo
The last tab allows the administrator to change the logo that is display in sidebar menu and the login screen. It is best to use a png file with a transparent background. The recommended size is 240x50 pixels.
After saving the logo, it may be necessary to clear the browser cache by hitting CTRL + F5.
If that doesn't do the trick, you may want to try the same for the relative uri /Images/logo.png. Be aware that you need to copy the exact path, that includes the casing of the path. For example, /images/logo.png may be construed by the browser as a different path than /Images/logo.png.