User Management
Most of the user setup is done in the submenu in the sidebar navigation. Besides the user setup, administrators can also manage user groups and roles. If need be, administrators can also transfer ownership of layouts, filters and profiles (data which we categorize as 'user-generated content').
Overview
The user management view has a number of panels and grids, as you can clearly see in this screenshot:
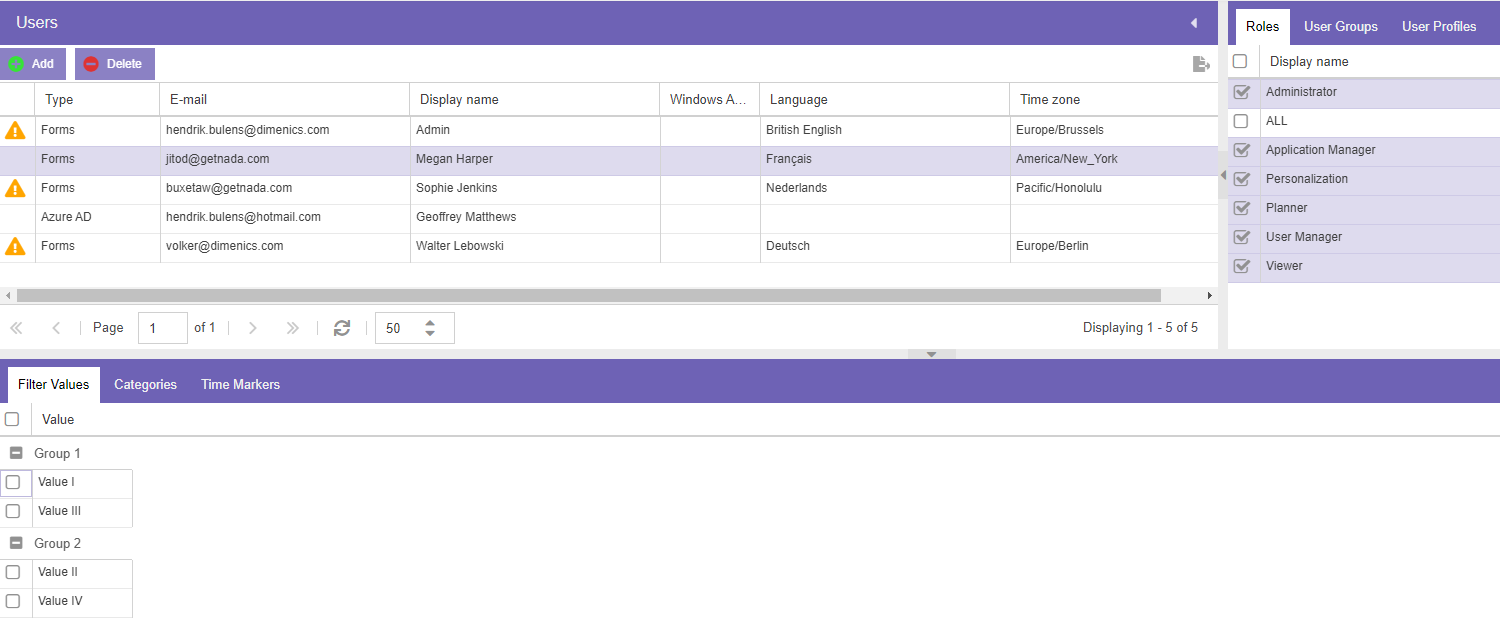
It may look overwhelming at first, but it's actually pretty simple. Let's take a closer look at the panels and what they do.
Users
The most important grid - on which all the other grids in this view are dependent - is the users grid. This panel shows all registered users in Dime.Scheduler:

Each row represents one user and a column represents a property of the user:
| Column | Description | Required |
|---|---|---|
| Type | This is the account type. This can be either a forms, Azure AD or Windows AD user. See here. | ✔️ |
| The e-mail address of the user. This is a vital property for forms users. | ✔️ | |
| Display Name | The display name of the user. | ✔️ |
| Language | The language in which Dime.Scheduler is shown for this particular user. | ❌ |
| Time zone | The time zone in which Dime.Scheduler is shown for this particular user. | ❌ |
Adding a user
Adding a user is fairly straightforward but an important decision needs to be made from the start: what kind of user do you want to add? To answer this question, check out this section. In a nutshell, you need to decide the source of the login. The easiest option is the 'Forms' login, which is a traditional user account in the database of Dime.Scheduler.
Required fields are the type, e-mail and display name. Administrators can also specify the language and time zone for this user, but this is not required. If either of these fields is missing, the user will be prompted to select a language and time zone at the next login attempt:
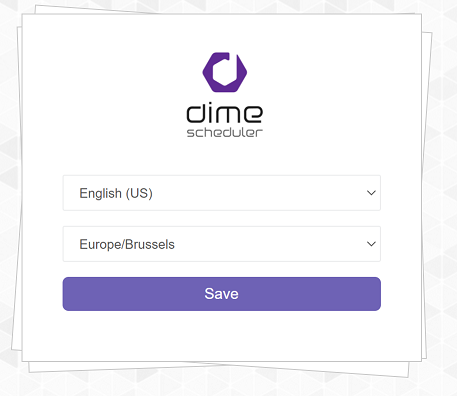
After an initial value is selected, the user can always change this value in the planning view:
| Language | Time zone |
|---|---|
| The language can be modified in the top menu: | The time zone can be configured in the settings fly-in window: |
Deleting a user
There's a sixth column, which - when the icon is shown - warns administrators that this user has shared content with other users and groups. Deleting this user without transferring ownership may result in corrupt or invalid data. Hovering over the icon reveals what content must be addressed before deleting the user:
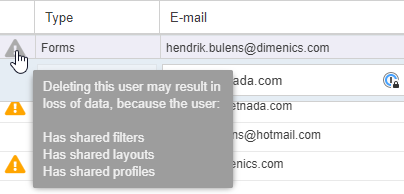
If no such icon is shown, it's safe to remove this user from Dime.Scheduler. As usual, you can do this by clicking the 'Delete' button or using the delete key on the keyboard.
User assignments
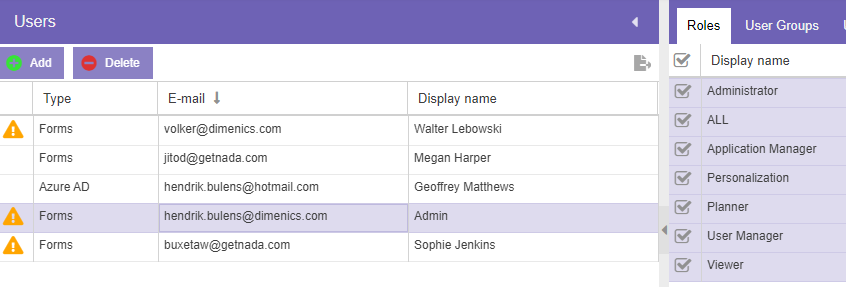
All other grids in this view are concerned with assigning roles, groups, profiles, etc. to users. The data in these grids are always related to the selected record in the user grid. The selected user will trigger all of these grids to re-evaluate which roles, groups, etc. were assigned to that user.
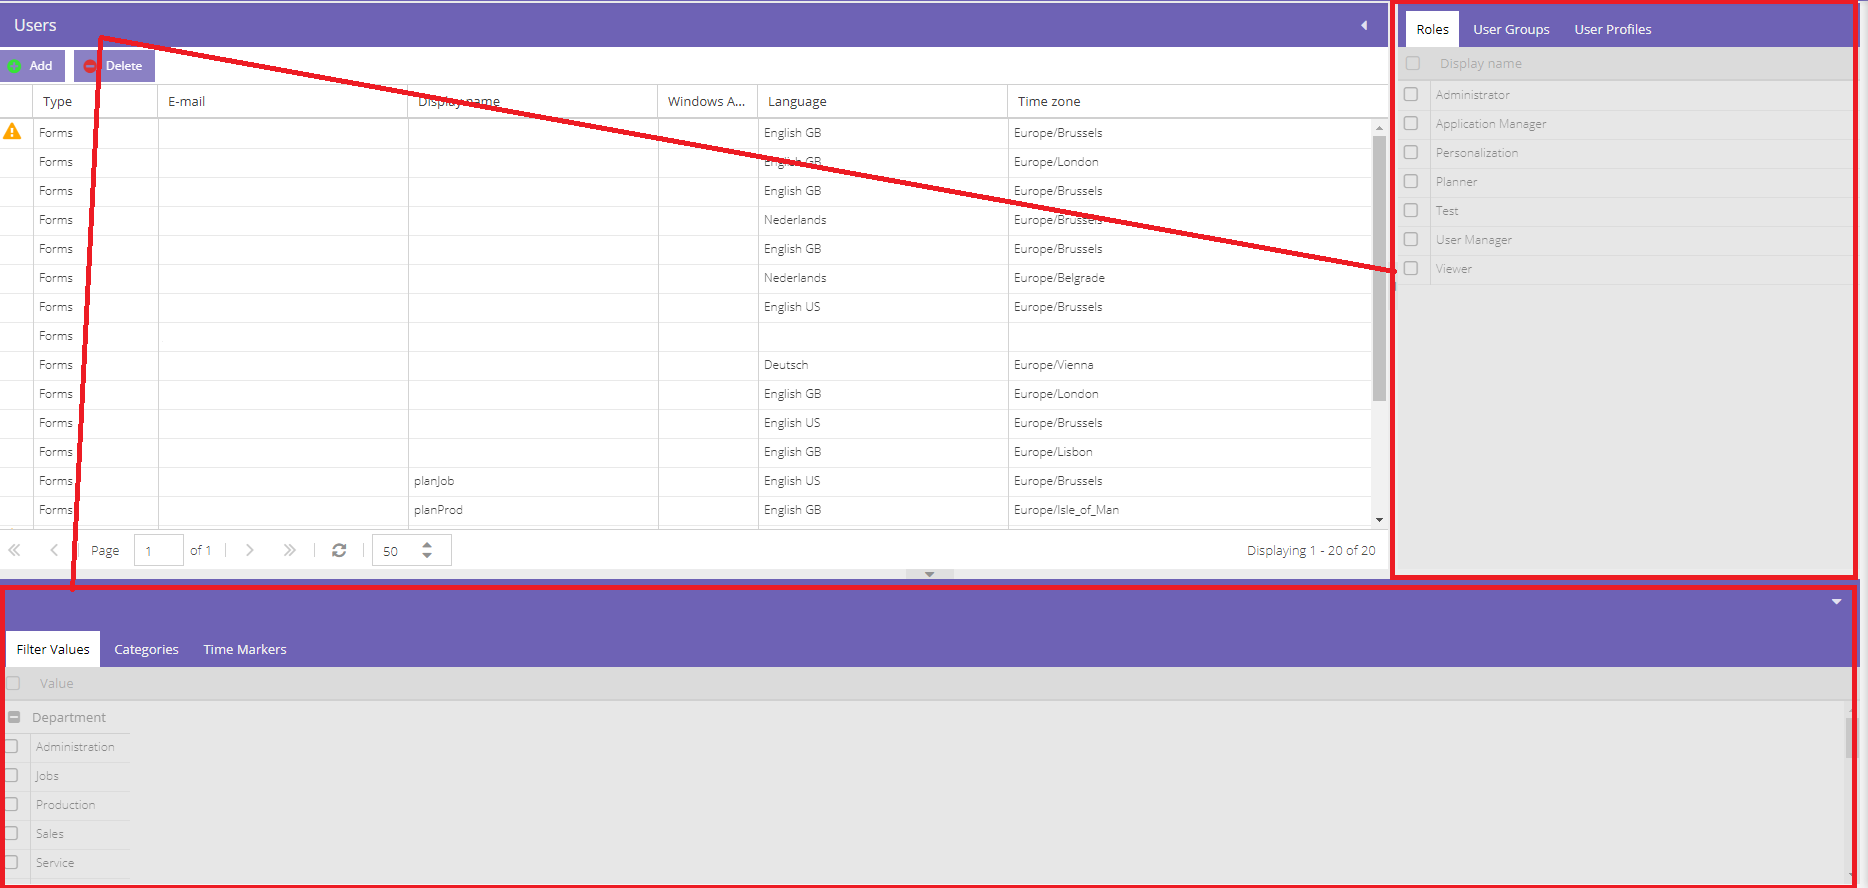
For example, this user has all roles assigned:
Whereas this user has all but one roles:
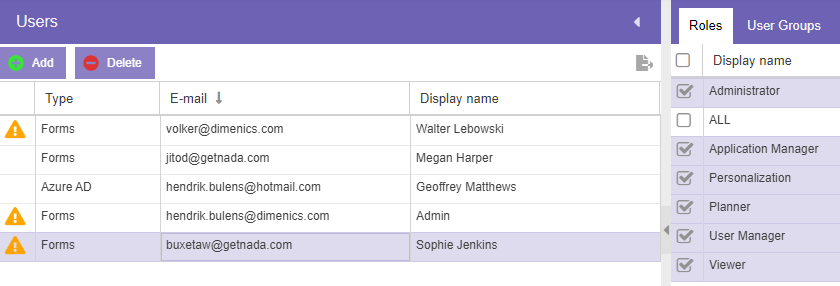
Assigning a role, category, etc. is as simple as ticking a checkbox. The only thing to be cautious for is to ensure the right user is selected.
As mentioned before, all the other grids are like this:
| Grid | Description |
|---|---|
| Roles | Define the user roles for a user. |
| User Groups | Add user to user groups. |
| User Profiles | Mark standard profiles for users. |
| Filter values | Assign filter values to users. When none are selected, the user will have access to all filter values. |
| Categories | Assign categories to users. When none are selected, the user will have access to all categories. |
| Time Markers | Assign time markers to users. When none are selected, the user will have access to all time markers. |
The setup of the last three grids can have a profound impact on what the user can see or do in the planning view. For more information, check out the data-driven security docs.
Account types
User management is arguably the first thing an administrator will want to turn its attention to when using an application - including Dime.Scheduler - for the very first time. Being a business application, integration with the pre-existing technology landscape is important, which is why there are multiple ways to authenticate.
All users of Dime.Scheduler need to have a user account. There are three ways in which this can be accomplished, either via Dime.Scheduler's own identity system or via connecting other identity services like Azure Active Directory and Windows Active Directory.
Windows Active Directory
As the name suggests, this is an account linked to Windows Active Directory. For these accounts, a user doesn't need to enter a password as it will be retrieved from the Active Directory. The following fields are mandatory for setting up a Windows-user:
- Display Name
- Windows Account: This is the Active Directory login (possibly without the domain name)
Azure Active Directory
As the name suggests, this is an account linked to the Microsoft Azure Active Directory (for example an Office365 account). For these accounts a user will be asked to log in via the Office 365 login page using his/her Office 365 credentials.
The following fields are mandatory for setting up an Azure AD-user:
- Display Name
Dime.Scheduler identity service
A forms or database account is stored in the Dime.Scheduler database. For this kind of account, a user needs to sign in using his/her e-mail address and password. A random password will be generated and shown at creation time. The user will also receive an e-mail with the option to reset the password.
The password must comply with the following policy:
- Must be at least 6 characters long
- Must contain a number
- Must contain a lower-case letter
- Must contain an uppercase letter
- Must contain a special character
The following fields are mandatory for setting up a Forms-user:
- Display Name
Optionally you can select a language and a time zone for the user. If not, the user will be requested to select them when starting the application for the first time.