Connectors
A single instance of Dime.Scheduler is able to connect with multiple back office applications (ERP, CRM, LOB, etc.). Many of these systems allow you to create multiple companies, business units, operational units, etc. Each of these organizational entities can be a data source application for Dime.Scheduler.
In order to send data back from Dime.Scheduler to these source applications, connection strings need to be specified.
Setup
The following fields can be managed in the connections setup view:
| Field | Description |
|---|---|
| Source Application | This code is sent by the back office application to identify itself as the source of a job and task and allows Dime.Scheduler to determine how to send data back to the back office application. This code must be the same in both the back office application and Dime.Scheduler. If the source code sent by the back office application couldn't be matched by any of the entries in Multi - back office, then Dime.Scheduler will not be able to send any data. |
| Send appointments to back office | Select to send the appointment data to the back office application. |
| Web Service | The URI that indicates the back office application to connect to. |
| Back Office | The type of back office application you are connecting with. |
| Login | The credentials with which to connect to the back office's web service.1 2 |
| Password | The credentials with which to connect to the back office's web service. 2 |
One of the key takeaways of Dime.Scheduler is that the application has no specific knowledge of the back office system. In fact, it is not even aware of its presence. Using a set of well-defined interfaces, systems are able to communicate with each other without knowing the actual implementation. That is partly why Dime.Scheduler has such a vast ecosystem as its architecture is built on popular open source technologies.
Action URIs
One area where this information becomes apparent is in the action URIs feature. These are merely URIs templates that are populated with data from tasks and appointments. All jobs must have a reference to a source application and type. At runtime, this information is populated into the template, which gives the remote application enough information to work with. The result of this is that data may originate from multiple sources, as long as the data is correct.
Back offices
Microsoft Dynamics 365 Business Central on-premise & Microsoft Dynamics NAV
There are a few ways to authenticate to a BC instance:
- When the login and password fields are left blank, the credentials of the Dime.Scheduler Back Office Windows Service will be used.
- This guide walks you through the process of obtaining a web service access key.
- The traditional way is to use the user name and password of the service account that can access BC.
Microsoft Dynamics 365 Business Central online
As of BC20, the OAuth2 authorization protocol must be used for SOAP and OData web services. To establish a connection with Dime.Scheduler, please follow the guidelines as instructed below. The official documentation provides additional information.
To enable service-to-service authentication, you'll have to do three things:
- Register an application in your Azure Active Directory tenant for authenticating API calls against Business Central.
- Grant access for that Azure AD application in Business Central.
- Multi-backoffice connector setup.
Create an Azure AD application for authentication to Business Central
- Sign in to the Azure portal.
- Register an application for Business Central in Azure Active Directory tenant.
- Specify a name. For example: "Dime.Scheduler for Business Central"
- Select the supported account type
- Add
https://businesscentral.dynamics.com/OAuthLanding.htmas a redirect URI (of type web).
- Add the following Application API permissions to the app:
- Dynamics 365 Business Central:
app_access - Dynamics 365 Business Central:
API.ReadWrite.All
- Dynamics 365 Business Central:
- Grant admin consent to these permissions. When done, the permission set should look like this in the portal:

Set up the registered application in Business Central
After you create the application registration, the next task is to configure the Business Central tenant to use it. You'll need the following information about the application registration: application (client) ID, directory (tenant) ID and client secret.
In the top-right corner, choose the search icon, enter Azure Active Directory Applications, and then choose the related link.
Create a new application. In the modal window, provide the following information:
- Paste the Azure AD App Client ID in the Client ID field
- Provide a description: "Dime.Scheduler"
In the User Groups section, add
D365 Basic ISVto the relevant company.In the User Permission Sets section, add the following permission sets:
- D365 Basic ISV
- Dime.Scheduler
- Local
- Optionally: any required permission set to access your custom objects
Click the "Grant Consent" button in the toolbar.
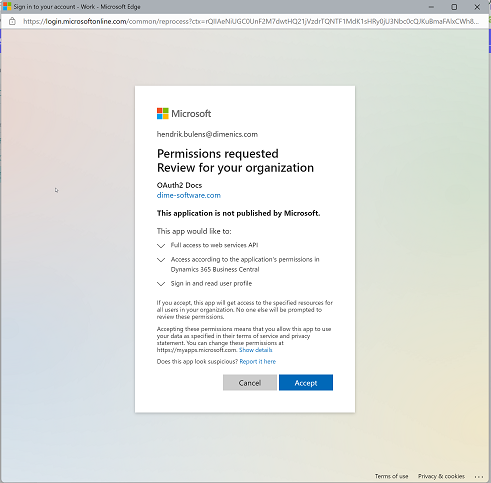
Proceed with the instructions that appear in the modal window until BC confirms the succesful completion of the action.

Setting up the multi-backoffice connector
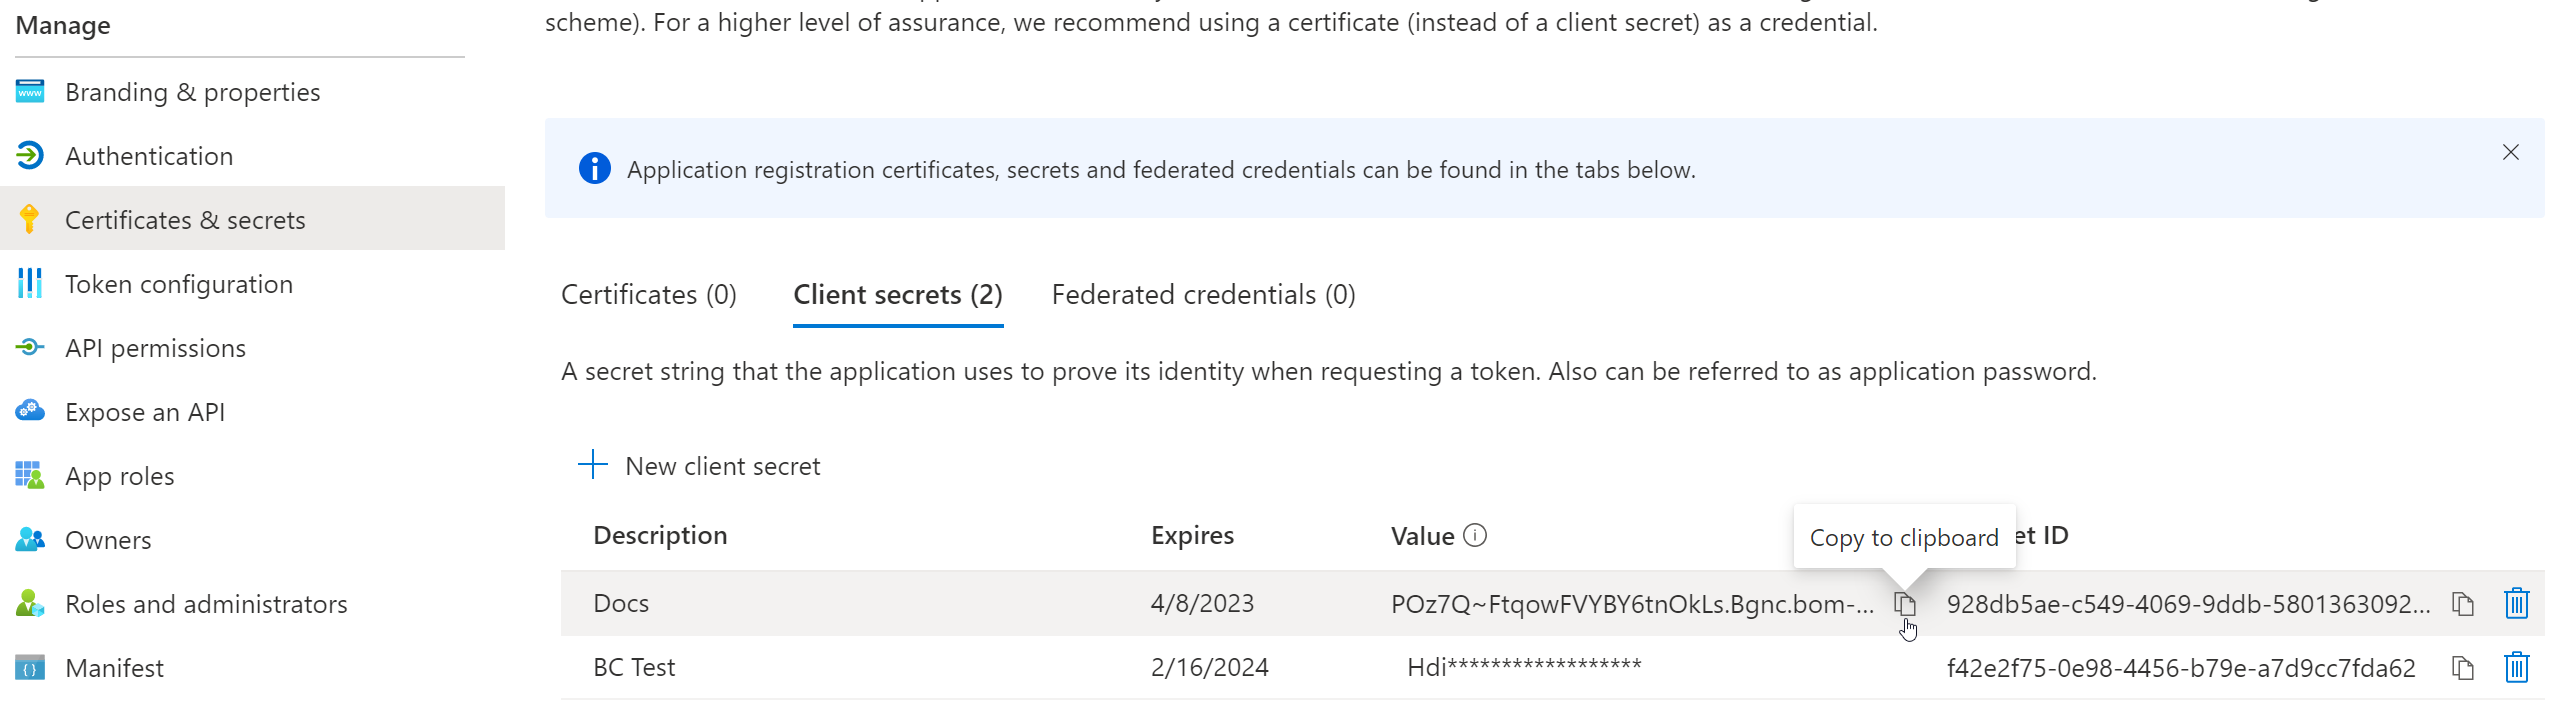
Back in the Azure AD App, we need to create a client secret. Navigate to the 'Certificates & secrets' section of the app and click 'New client secret'. Fill out the details and copy the client secret:
The only remaining task is to create a multi-backoffice connector in Dime.Scheduler for the BC SaaS/Online back office type.
- In the login field, use the Directory (tenant) ID.
- In the password field, take the following string and replace
CLIENTIDandCLIENTSECRETwith the corresponding values from the app registration:client_id=CLIENTID&client_secret=CLIENTSECRET
Save the record and you have successfully set up the connector for Microsoft Dynamics 365 Business Central Online.
- See Back Office↩
- When left blank, the credentials of the
Dime.Scheduler Back Office Windows Servicewill be used.↩