Upgrade to 2020.1.0
Overview
This release has a few breaking changes. As we are preparing the solution for the cloud, we needed to upgrade a few elements that will no longer be supported by Microsoft in the near future.
Before you head to the general upgrade guide, make sure to execute the steps in this document first to avoid problems down the road.
Upgrade steps
Due to internal code reshuffling, the integration endpoints have been slightly impacted. Although nothing radically has changed, there is a chance you may encounter issues with the upgrade. Therefore, it is best to ensure the website and the Windows services are switched off before you begin with the update.
Remove MSMQ queue
The MSMQ queue "NServiceBus.Subscriptions" is deprecated and should be removed. The easiest way to do this is to run this PowerShell script:
Get-MsmqQueue -Name "NServiceBus.Subscriptions" -QueueType Private | Remove-MsmqQueue
Alternatively, these manual steps will do the job just as fine:
- Navigate to Computer Management (or run
compmgmt.mscfrom the command-line) - Expand the 'Services and Applications' node
- Expand the 'Message Queuing' node
- Open the Private Queues folder
- Delete the NServiceBus.Subscriptions folder.
☝️ Keep in mind that the order in which the Windows services are started [for the first time] matter. In order for the integration between Dime.Scheduler and the back office to work, it is important to start the Dime.Scheduler Service Bus Windows Service first, followed by the other plugins (like the back office). You might compare the Service Bus Windows Service to a registration booth; it is the place to submit a subscription to events from the Dime.Scheduler planning application. If the service is not running, then is not possible to process the subscription requests. Once a subscription has been completed, services may be started in any order.
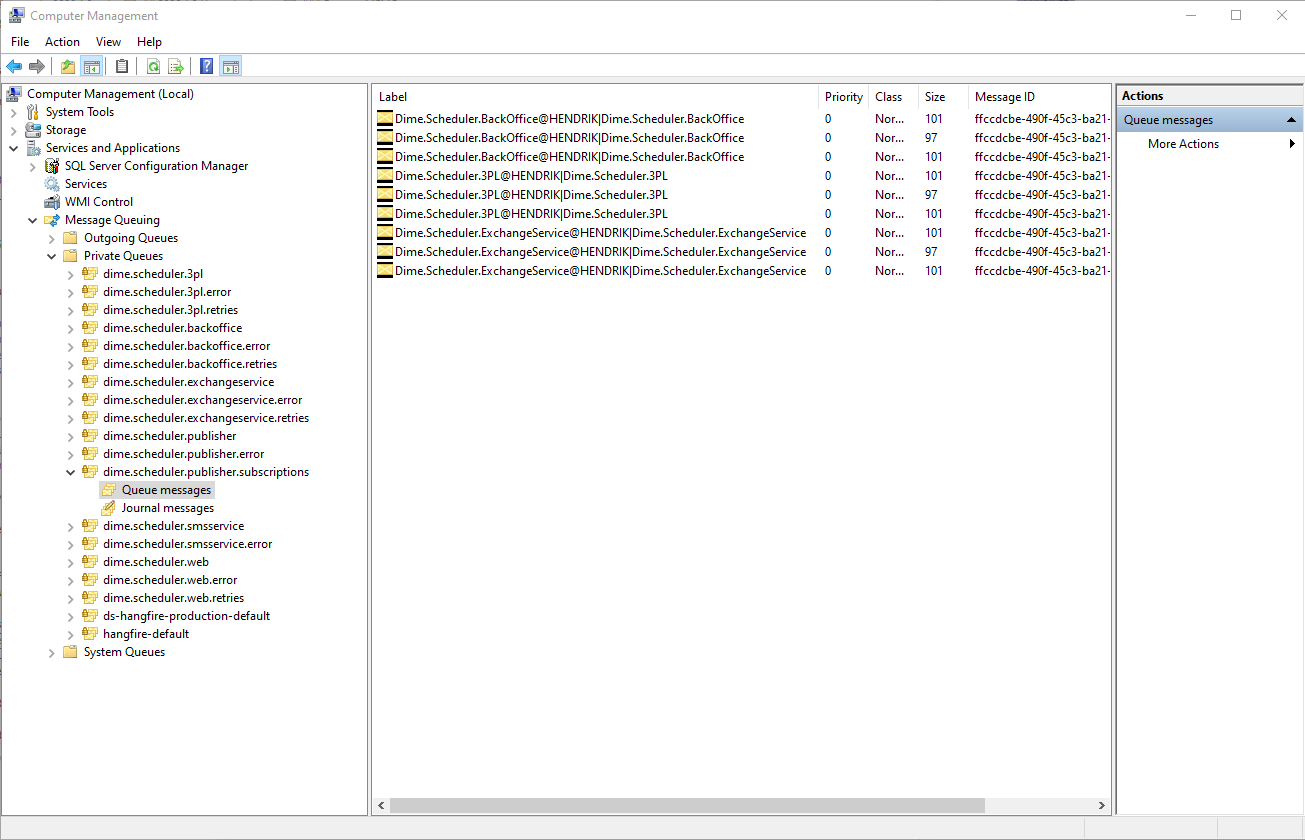
After restarting the services, please check if there are at least 3 messages in the Dime.Scheduler.Publisher.Subscriptions queues with the prefix 'Dime.Scheduler.BackOffice'. To do this, open the 'Queue Messages' node, as demonstrated in this screenshot:
Update ASP.NET Core Runtime Windows Hosting Bundle
The infrastructure behind the back office application has been updated. This means that we no longer require the ASP.NET Core 1.x Hosting Bundle. This can be safely removed. As of Dime.Scheduler 2020, the ASP.NET Core 2.2 Runtime (v2.2.8) - Windows Hosting Bundle is required to run the back office web application.
Set preload enabled for websites
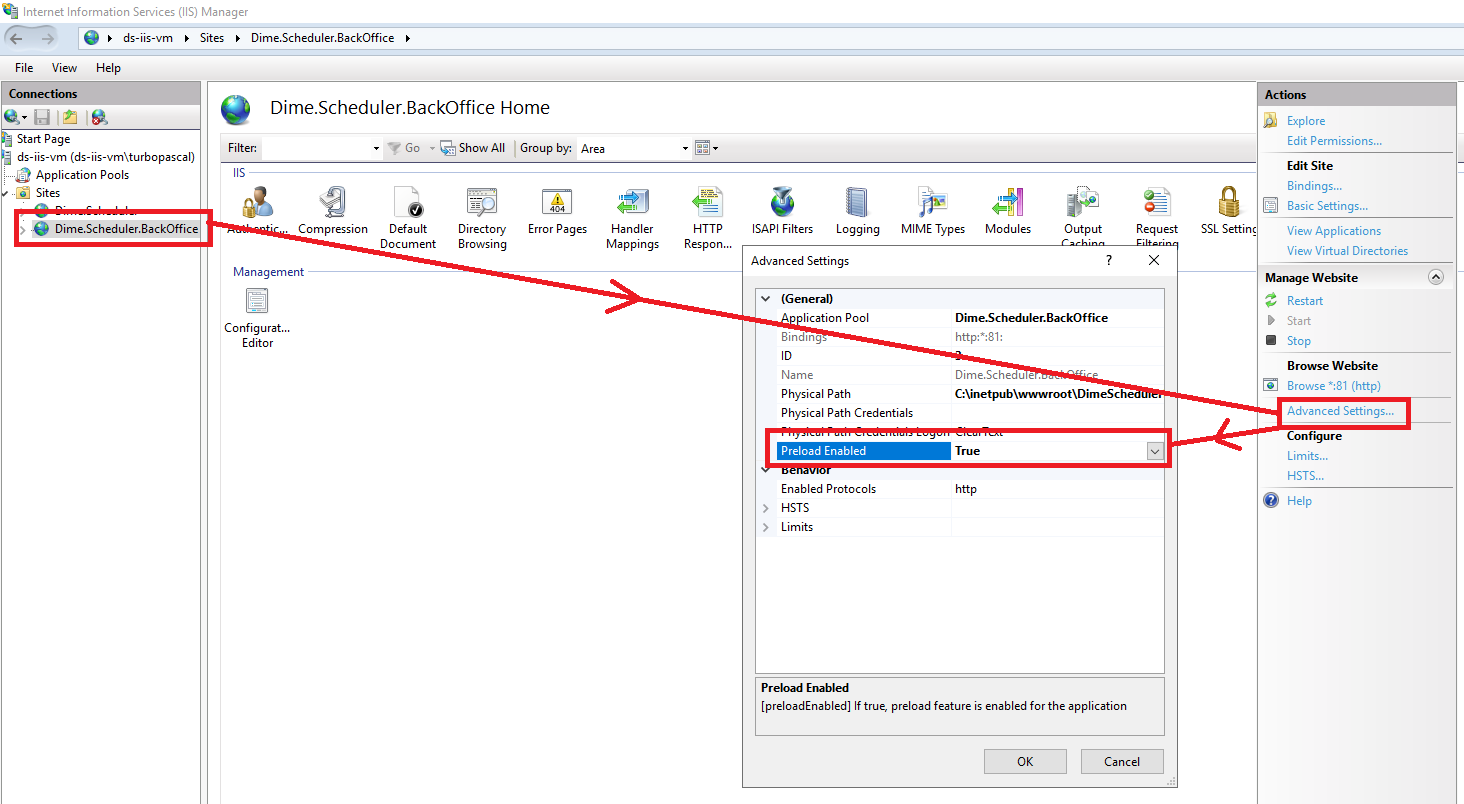
To speed up the startup of the web applications, we recommend you to set the IIS website "Preload enabled" to true. You can do this with the following steps:
- Go to the IIS Manager
- Locate the two Dime.Scheduler websites
- Open the advanced settings
- In the general tab, set the "Preload enabled" switch to true
If you are an avid PowerShell user, the following script will do the job just as well:
Import-Module WebAdministration

# Name of the websites may vary
$dsWebsiteName = "Dime.Scheduler"
$dsBoWebSiteName = "Dime.Scheduler.BackOffice"

Set-ItemProperty "IIS:\Sites\$dsWebsiteName" -Name applicationDefaults.preloadEnabled -Value True
Set-ItemProperty "IIS:\Sites\$dsBoWebSiteName" -Name applicationDefaults.preloadEnabled -Value True
Needless to say, this configuration flag will be automatically set to the right value with the new installation experience, which you can expect in the next release.