End to end installation tutorial
In this tutorial, we will go through the new installation process on a step by step basis. After this tutorial you should feel confident of creating a fresh Azure environment and deploying Dime.Scheduler on it that.
Step 1: Download the installation package
First things first. Before anything useful can be done, we need to grab the installation package from the partner zone. Download the package to your local system and unzip it when it has completed downloading.
You can already go ahead and run Dime.Scheduler.Deploy.exe. This way we'll be good to go when our validation checks of the Azure subscription are complete.
Step 2: Validate your Azure subscription
It goes without saying that you need a valid Azure subscription before you can use the services on the platform. It is very likely that you and your organization have at least one subscription already. There are many ways in which subscriptions can be managed. Some divide subscriptions by department (DevOps, R&D, Sales, IT, etc.) while others do this by product or by environment (development, test, user acceptance, production). In the end it doesn't really matter how you do it, as long as there is a logic behind it and that it is being applied consistently.
Mature organizations will have established a cloud strategy. On Azure, a part of this can be enforced through services like Azure policy, locks, tags, etc. For example, it is possible to set spending limits or prohibit development teams from using high-performance (and therefore costly) services.
Before we continue, please make sure that you have access to such a subscription and that you can deploy resources to it.
Step 3: Deploy resources on Azure
With these a priori checks behind us, it is time to fire up the new installer. Run it and head over to the "Azure" tab.

Probably the only thing that you can do wrong in the Azure deployment is that you choose a duplicate resource group name.
Ensure a unique resource group name
Resource group names are unique per subscription. If you are deploying a test environment, all parameters are already set correctly, with the resource group named "ds-test-rg". For production, we recommend you use the name "ds-prod-rg". We recommend the app-environmentname-rg naming convention but you are free to choose your own.
Everything related to Dime.Scheduler is contained in this resource group. If you decide to delete this resource group afterwards, you will have safely removed only Dime.Scheduler and nothing else.
Choose a region
For development and testing purposes, the region is not a big issue. For production purposes however, we strongly recommend you think long and hard where to deploy your resources. Usually the region that is closest to you (and your customer) will make most sense.
Configure the Azure Virtual Machine
Let's move down a little bit so we see the virtual machine section.

Again, if you are deploying a test environment, the default values are sufficient. An Azure Virtual Machine named 'ds-iis-vm' will be deployed that will have Windows Server installed. It is a small machine (4GB of RAM) but if it only is for running Dime.Scheduler as a test, this should be enough. Feel free to pump up those rookie numbers; the more powerful the computer, the faster Dime.Scheduler will go.
Also make sure to enter the credentials for a local administrator. Note that this local user doesn't exist yet so you may choose whatever user you want. If you omit these values, the default administrator credentials that Dime Software provide will be used. However we cannot urge you enough to not do this.
By default the VM option is ticked, so do a quick check if this is still true.
Configure the Azure SQL databases

It's more of the same story when we look at the Azure SQL section: everything is filled out to be enough for testing purposes. A database server will be created with two Azure SQL databases named 'ds-sqldb' and 'ds-bo-sqldb'. If you are deploying a production instance, bump the database edition and performance level to at least 'Standard'.
Configure the Service Bus
In this tutorial, we want to keep things as simple as possible. We won't even go into detail for the third section, the service bus. By default this option is not checked so you can pretend it's not even there.
Deploy to Azure
We are good to go. When you're ready, click the Deploy button. Shortly after, a PowerShell window will be opened and you'll see all kinds of text appear in a Matrix-style fashion. Right at the beginning, you will be prompted to enter your credentials and choose a subscription 1. Once that's over with, you can relax and let the Azure Resource Manager do its job. If all goes well, this will take about 15 minutes. Keep the PowerShell window open and soon you'll have an up and running Azure environment for Dime.Scheduler and we can get on to the second stage of the installation process.
To deploy either an Azure environment or Dime.Scheduler, PowerShell is used extensively. For Azure, the Azure PowerShell module is used. It may be possible that this module does not yet exist on your machine. So it is possible you may encounter prompt messages like this:
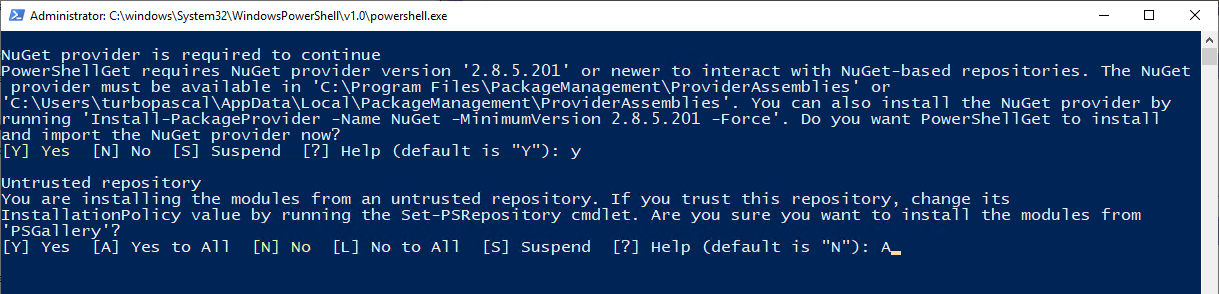
Unless you have more knowledge on the topic or specific requirements, go right ahead and enter "Y" (for yes) or "A" (for all) for each of these questions.
This will delay the installation process as these packages have to be installed as well. However, this is only done once. All subsequent installation or upgrade runs on this machine will skip this step.

Step 4: Validate Azure deployment
Let's head over to the Azure portal. Make sure you're working in the right subscription - otherwise the Dime.Scheduler resource group will be not be there. To find the resource group, open the navigation menu and select "Resource Groups". You should find the resource group here, and then click it.
If everything went correctly, you should see 9 entries:
- Database - default value: ds-bo-sqldb
- Virtual machine - default value: ds-iis-vm
- Network interface card - default value: ds-iis-vm-nic1
- Public IP address - default value: ds-iis-vm-pip
- Disk - default value: ds-iis-vm_OSDisk
- Network security group - default value: ds-nsg
- Database - default value: ds-sqldb
- SQL server - default value: ds-sqlserverXXX
- Virtual network - default value: ds-vnet
Step 4: Preparing the installation of Dime.Scheduler
This step is essentially the same as documented here. For the sake of completeness of this tutorial, let's run through it together. As mentioned in this article, for now you need to copy the installation package to the Azure VM to complete the installation.
To deploy the application successfully, you need to modify four configuration items:
- The Azure database connection strings (2x)
- The local administrator credentials
Connection strings
Azure SQL
Head back to the resource group on the Azure portal and select a database (not the database server!). Click the 'Show database connection strings' link:

Copy the connection string to your clipboard. However, this connection string is not yet complete: make sure to replace the {your_password} with the password of the administrator credentials that you submitted in the Azure deployment step.

Paste the connection string in the corresponding text field in the installer. If you used the default database names, then you can paste the same connection string in both text fields. You only need to modify the catalog: the first text field should indicate 'ds-sqldb' whereas the second should show 'ds-bo-sqldb'.
Windows Services
We will use the local administrator account to run the services. Use the same credentials as the ones you submitted in the Azure deployment step.
Important to note is that you must use the full name of the user, that is with the domain. In other words, use this format: VM NAME\USER NAME. For example: ds-iis-vm\mylocaladministratoraccount.
Step 5: Deploy Dime.Scheduler
When you're ready, click the Deploy button. Just like the Azure deployment, a PowerShell session will be initiated. In more true Matrix style, many lines will come on the screen; they are usually informative but also errors will be shown.
Just so you know, here are the steps in the installation script:
- Grant the local administrator the 'Logon as Service' right.
- Ensures the required Windows features are installed (if you used the Azure installer, this will be correct already)
- Installs Web Deploy
- If either the back office or planning application module is selected:
- Installs SQL package
- If the back office module is selected:
- Installs the ASP.NET Core Windows Hosting Bundle
- Installs Google Chrome
- If the planning application module is selected:
- Add event log source
- Removes the "Default Web Site" port 80 binding
- Creates application pool and website
- Deploys web application
- Deploys the database
- If the service bus module is selected:
- Deploy the service bus windows service
- If the back office module is selected:
- Add event log source
- Creates application pool and website
- Deploys the web application
- Deploys the Windows Service
- Deploys the database
- Opens port 81 in the firewall
It usually takes a little while longer when the installer is run for the very first time. Firstly, the installer needs to download packages that aren't on this computer yet and secondly, the database deployment needs more time to deploy an entire database instead of updating a table or two.
The entire installation time varies; for minor releases the upgrade time could be less than a minute whereas it could take several minutes for a major upgrade. Don't go too far because we'll do our installation checks in just a minute. If the installation has completed, you may close the window. Let's keep the installer open; if something has gone wrong, we'll be able to run the installer again with the same parameters quickly.
Step 6: Validate Dime.Scheduler
Web sites
Type 'IIS Manager' in the Windows Server search and select the 'Internet Information Services (IIS) Manager' app.
In the connections pane, open the ds-iis-vm node and click on Sites. If you see two entries, as depicted below, the installation probably succeeded:

To do the actual check, you can browse to the websites:
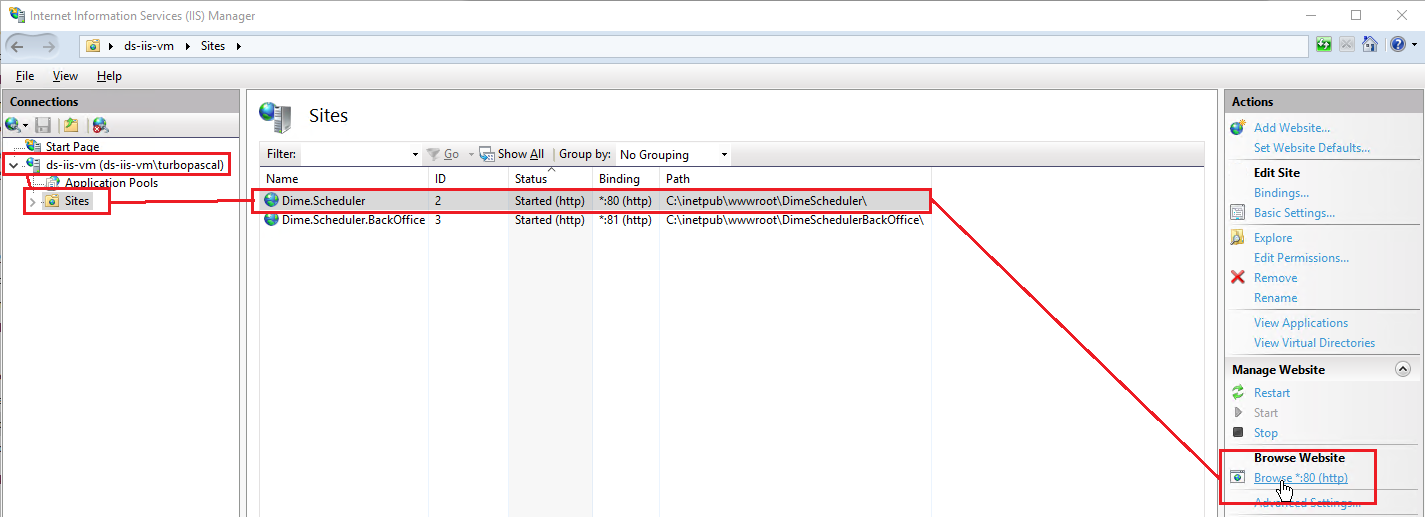
Otherwise, you can use the root URI you pasted in the installer. If you append :81 to the root uri, you end up on the back office site.
Windows services
Type 'Services' in the Windows Server search and select the item in the results pane. In the list of services, look for Dime.Scheduler Service Bus and Dime.Scheduler Back Office. Check if they are running, and running as your local administrator account.
Step 7: Configure Dime.Scheduler
Let's go back to the installer and navigate to the Configuration tab:
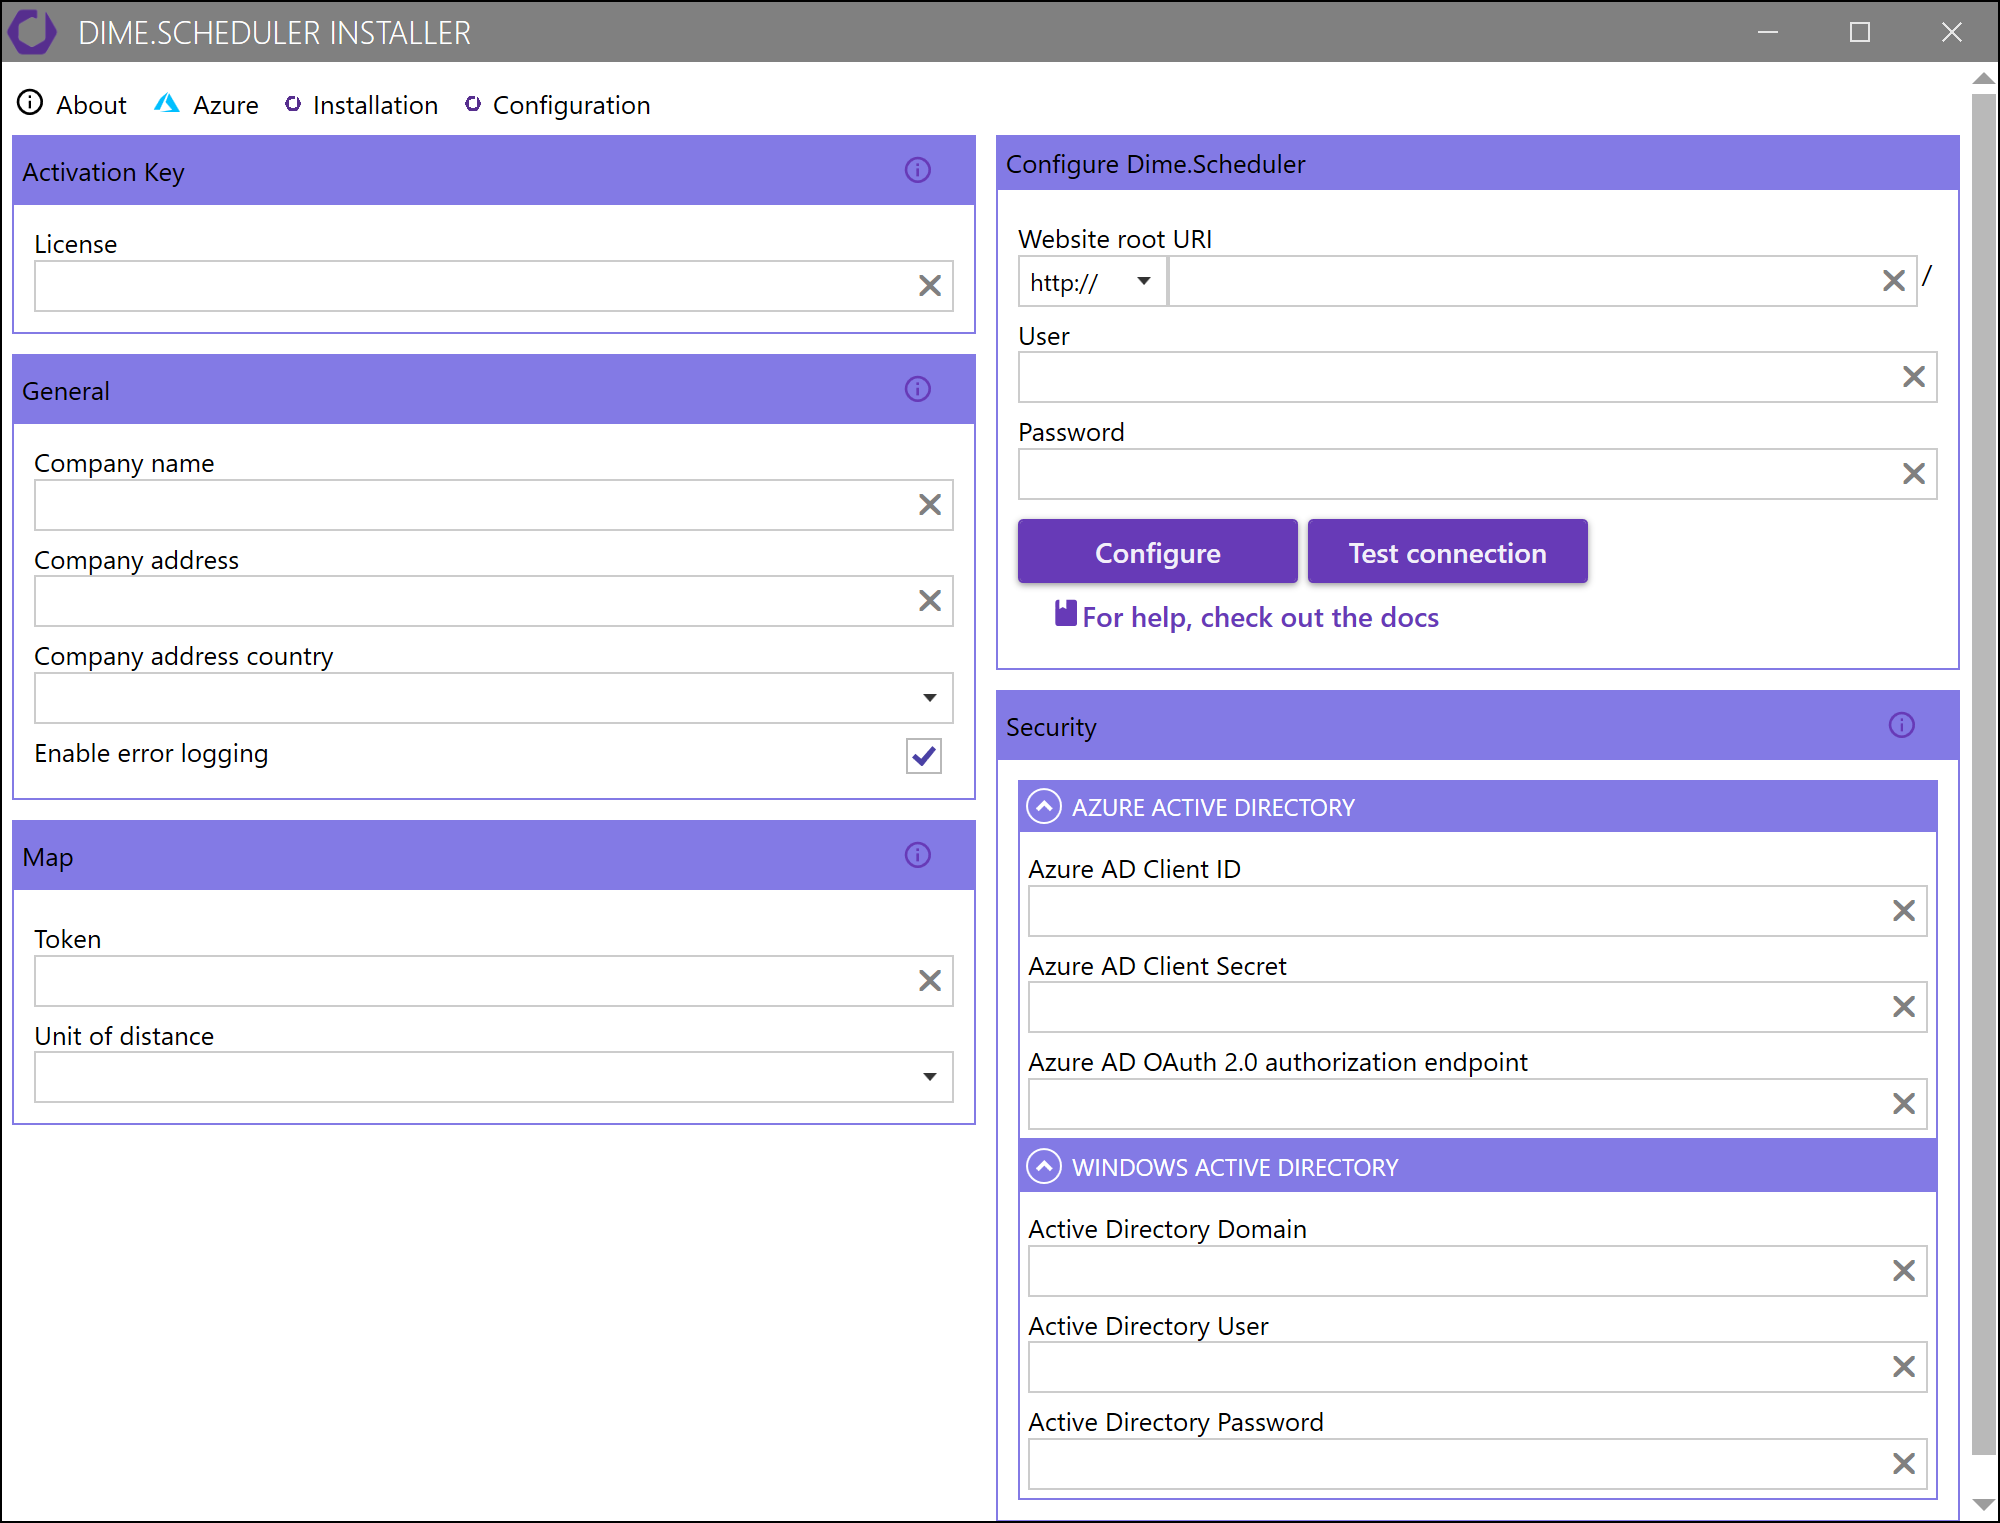
As you can clearly see, there are many fields in this area. Don't sweat it, most of them are easy and if you leave them empty, they will be ignored altogether. There are eight sections, of which we will cover only a few in this tutorial. If you want to learn more about the other fields, continue reading here.
We'll begin by activating the license. You should have received a license by now by Dime Software so look it up and copy the key in the License field. Next, navigate to the General area and fill out the company name and address. Now it's time to actually synchronize these values with Dime.Scheduler. To do this, head over to the Deploy section where you will need to fill out the URL of Dime.Scheduler and the Forms credentials of an administrator in Dime.Scheduler. You can test the connection by hitting the 'Test connection' button and if it succeeded, you can hit the Configure button. If all went well, you should be able to navigate to Dime.Scheduler and the Dime.Scheduler back office websites without errors.
Step 8: Install the Dime.Scheduler Extension
A Business Central Sandbox environment is used for this tutorial. See this document for the deployment procedure for live environments.
It's time to step away from Dime.Scheduler and do some work on Business Central. So head over there and open the Extensions view:
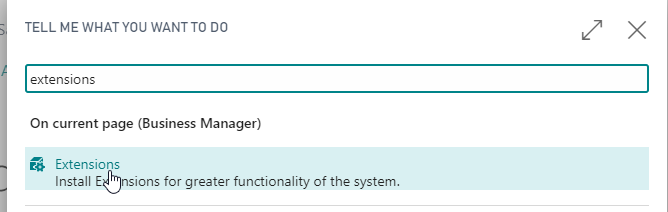
In this window, click 'Manage' and then 'Upload extension'. Locate the extension Dime_Dime.Scheduler_x.x.x.x.app file in the installation package, upload it and deploy it.
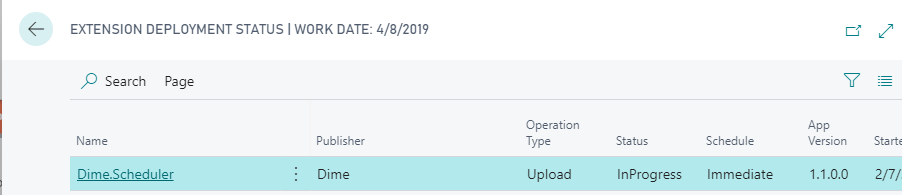
This may take a few minutes, you can follow the status in the deployment status window:
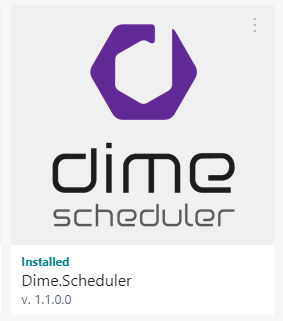
When it's done, the Dime.Scheduler extension should appear in the list of installed extensions:
Step 9: Run the wizard
For the sake of this tutorial, we are going to spend little time on the wizard. Locate the FastTrack wizard and fire it up.

Establish connection
The first step is an important one because this will establish the connection between Dime.Scheduler and Business Central. The scheduler URL is the same as the root URI parameter but it must be prefixed by the http(s) protocol. The credentials are the ones you just edited in Dime.Scheduler.
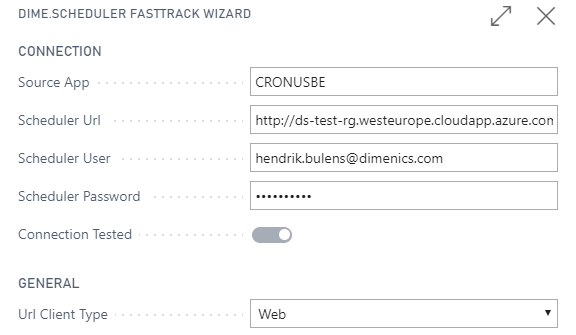
Test the connection and move on to the next step in the wizard.
Resource planning
Enable the resource planning by toggling the resource planning switch. Click next.
Service order planning
Enable the service order planning by toggling the service order planning. Click next.
Job planning
Enable the job planning by toggling the job planning. Click next.
Assembly planning
Not necessary in this tutorial, so go right ahead and click next.
Work center planning
Not necessary in this tutorial, so go right ahead and click next.
Machine center planning
Not necessary in this tutorial, so go right ahead and click next.
Production routing planning
Not necessary in this tutorial, so go right ahead and click next.
Sales planning
Not necessary in this tutorial, so go right ahead and click next.
Absences planning
Enable the absences planning by toggling the service order planning. Click finish and confirm to synchronize with Dime.Scheduler. This will take a few moments.
Step 10: Add Business Central to the connectors
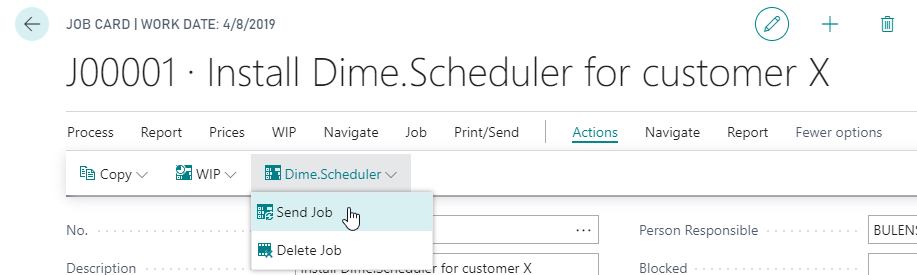
Step 11: Create a job and send to Dime.Scheduler
Look for the jobs list in business central:

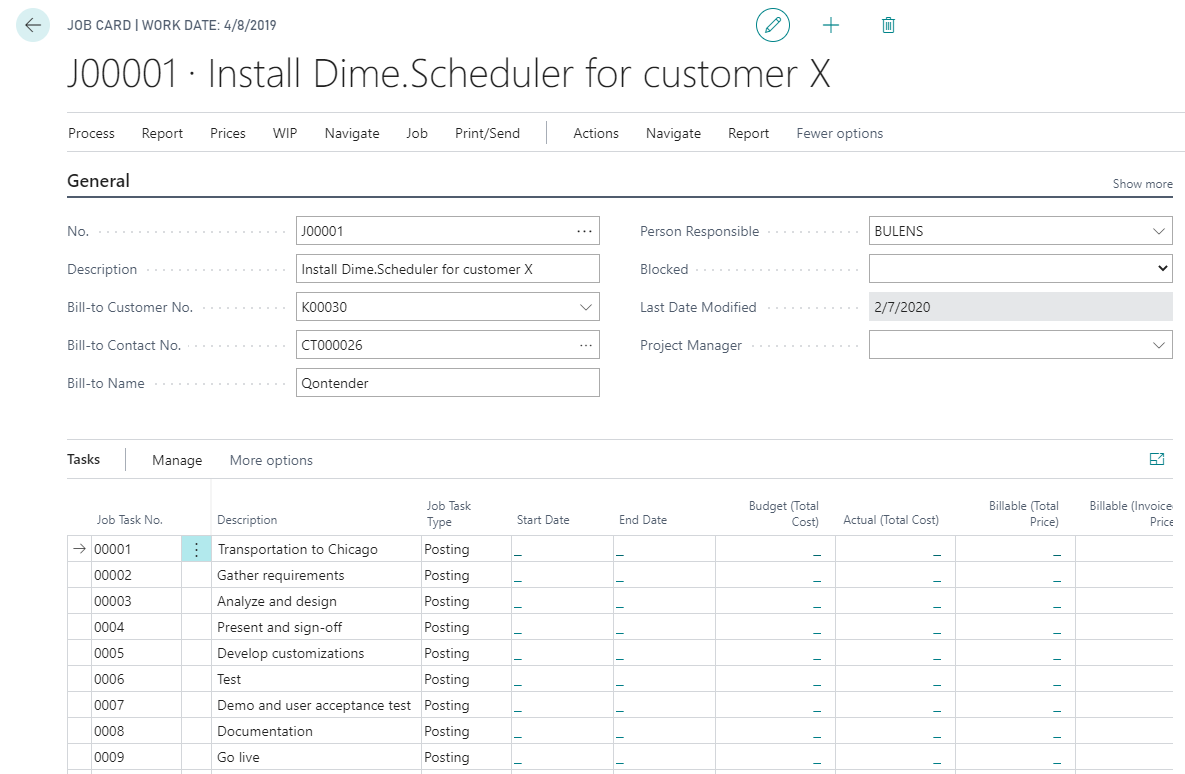
Let's create a new job. Add some relevant data and task lines to the job like so:
When you're done, send it to Dime.Scheduler:
After a few seconds, you should see these records appear in the open tasks component:

Step 12: Plan the job in Dime.Scheduler
The circle is almost complete. We know the integration from Business Central to Dime.Scheduler is working fine, let's see if it works the other way around just as fine. To do this, simply drag an open task to the planning board.
Step 13: Validate the transaction
After you've done this, head over to the back office web site (port 81). Navigate to the transactions page. In this grid, you will see all the transactions that have been made and processed by the back office plugin. The latest transactions will appear on top.
You should see a record similar to this:

This tells us that the record has been sent to Business Central successfully.
This doesn't mean however that the result is correct. To do that, we need to go back to Business Central. Look for the DS Appointments table:

If you sort this list by 'DateTime Received' in descending order, you'll see the last transaction on top.
As we can see, it looks like the transaction has been completed without any errors.
![]()
Final words
In this tutorial, we went through the process of starting with the square root of jack to a fully functioning and integrated instance of Dime.Scheduler running on Azure. You learnt how quickly and with limited effort you can get started with Dime.Scheduler.
Read more
- A browser with JavaScript enabled is required to authenticate.↩