Download Dime.Scheduler
Getting the installation package
Head to the Dime.Scheduler partner zone on partnerzone.dimescheduler.com, log in and navigate to the Dime.Scheduler downloads section:
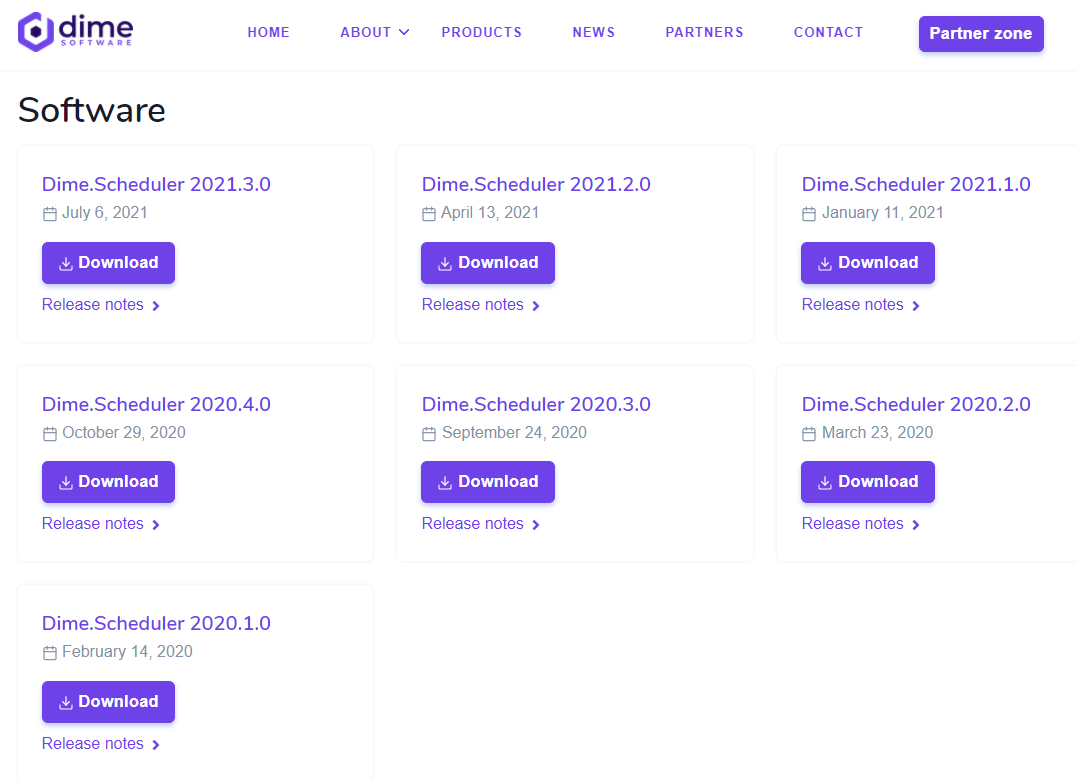
Download the (latest) installation package by clicking on the corresponding link. Once downloaded, copy the package to the server where you will deploy Dime.Scheduler.
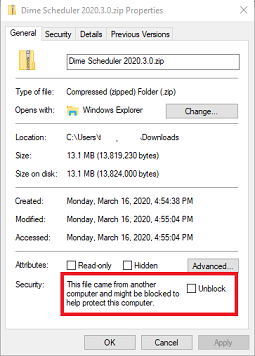
Make sure the package is unlocked to avoid issues further down the road:
Inside the package
The package contains all the artifacts you need to deploy the application.
.
+-- Back Office Systems
+-- Dime.Scheduler
+-- Pricing and Licensing
+-- Software License Terms
+-- README.txt
Obviously, it has all the bits and bytes of the main planning application but also the supporting software such as WebDeploy, IIS Warmup and .NET Core Hosting Bundle. All the plugins that we currently support are also in there. In other words, the package is self-contained.
Inside the Dime.Scheduler folder, you will find the installer, which is capable of deploying everything except the web server, SQL Server, Business Central and the legacy Exchange connector. Otherwise it is a complete installer that deploys services, databases, tools and web applications.
The connectors for the different back office systems (CRM, NAV, BC) are in the corresponding directory. For NAV there are the .fob and .txt files while BC also has the new extension (.app) format.
Also attached are the software licensing terms and the pricing files.
Recommendations
Here are a few practical recommendations for the remainder of the installation manual:
- Keep the path where you extract the package short and sweet. Paths like
C:\dshit the spot! - Avoid using special characters like
+-/\[]\*()in the base directory names since those can cause issues in some steps of the deployment.